
Mini Desk Calendar
Howdy!
My calendar at work kept going missing, so I decided to make one that I could easily spot. When I posted it on a stamping forum one of the ladies asked how I did it, so I made a tutorial. The one I filmed is a little different dimensions, but the construction is the same. My original will be at the end of the post, but here is the one from the tutorial.

I used Rose Red, Blushing Bride, and Whisper White cardstocks with the Love Blossoms DSP Stack. For the sentiment, I used the You're So Lovely stamp set, Rose Red ink, and the Banner Triple Punch. Other supplies and tools include: Mini Brads, Subtles Candy Dots, Candy Dot Base Brads, 2 1/2" Circle Punch, Decorative Dots Embossing Folder, Stampin' Pierce Mat, Paper-Piercing Tool, Dimensionals, Tear & Tape, Snail Adhesive, Simply Scored, and Stampin' Trimmer.


The cardstock and paper that you will need:
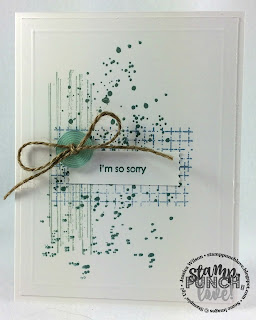
My original used all the same tools and supplies, just different colors and slightly different dimensions. I used Basic Black, Pacific Point, and Whisper White cardstocks with the Perfectly Artistic DSP from Sale-A-Bration and Memento Tuxedo Black Ink.


My calendar at work kept going missing, so I decided to make one that I could easily spot. When I posted it on a stamping forum one of the ladies asked how I did it, so I made a tutorial. The one I filmed is a little different dimensions, but the construction is the same. My original will be at the end of the post, but here is the one from the tutorial.

I used Rose Red, Blushing Bride, and Whisper White cardstocks with the Love Blossoms DSP Stack. For the sentiment, I used the You're So Lovely stamp set, Rose Red ink, and the Banner Triple Punch. Other supplies and tools include: Mini Brads, Subtles Candy Dots, Candy Dot Base Brads, 2 1/2" Circle Punch, Decorative Dots Embossing Folder, Stampin' Pierce Mat, Paper-Piercing Tool, Dimensionals, Tear & Tape, Snail Adhesive, Simply Scored, and Stampin' Trimmer.


The cardstock and paper that you will need:
- Base Cardstock: 5 5/8" x 3 1/2"
- Scored at 1 1/8" and 1 5/8"
- Accent Cardstock: 2 5/8" x 3" and 7/8" x 3 1/4"
- DSP: 2 3/8" x 2 3/4" and 5/8" x 3"
- Calendar: 2 1/8" x 2 1/2"
- Sentiment Base: 1" x 4 3/4"
- Sentiment Piece: 3/4" x 4 1/2"
And here is the calendar pdf: just click here.
My original used all the same tools and supplies, just different colors and slightly different dimensions. I used Basic Black, Pacific Point, and Whisper White cardstocks with the Perfectly Artistic DSP from Sale-A-Bration and Memento Tuxedo Black Ink.


Thanks for visiting!

Love this handy and awesome calendar! Thank you for the pdf & great instructions! Do you have any tips for cutting the calendar out so they are all the same?
ReplyDelete