
Shabby Chic Thank You
Howdy!

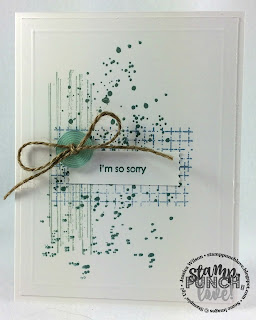
Today's card features stamp sets and techniques that I simply love, but haven't used in awhile, and is for someone that helped make my sister's special day beautiful. I grew up and a VERY small town. People like to say that they're from a small town, but when they tell me how "small," I almost always end up giggling while I break to them how not small their town really is. To give you an idea of how small my town is, my graduating class was 40 people - and, we were a record breaking class at the time. All of this just to let you know that in my town everyone pretty much knows everyone and we often help each other out without even thinking about it, which is pretty much what happened with the recipient of this card. She is a cafe/shop owner that loaned my mother a large, white, rustic-ish birdcage out her shop display that we used in the gift area for cards and cash gifts. So, without any further ado, here is the card.
I started by sponging the edges of a Very Vanilla A2 card front with Crumb Cake ink and a wedge of a Stampin' Sponge (I LOVE to sponge. I went through a sponging phase awhile back, but haven't done it in ages). I took that pretty far in, but made sure to keep the center vanilla. Next, I layered the sponging the same way with Early Espresso ink, but no taking it as far in. After that, I stamped the flourish from the Timeless Textures stamp set in Early Espresso over the sponging.

Now, I rubbed that down with my Embossing Buddy realllly well and stamped the stand from the Builder Birdcage stamp set in Versamark ink. I covered that in white embossing powder and heat set it. Then, I repeated those steps with each cage piece.
Setting that aside to cool, I stamped the "thank you" from the Eastern Beauty stamp set on Very Vanilla in Early Espresso. I cut it out with the Stitched Shapes Framelits (you need these in your life, by the way).
Finally it is time to start layering. I added the cooled the card front to an Early Espresso A2 card base. From there, I added some loops of Metallic Copper Thread with a couple of mini glue dots. I topped that with my sentiment circle using dimensionals to finish the card.
Thanks for visiting (and my bearing with my storytelling)!

Comments
Post a Comment